Today, we are installing the very popular Wyze camera outdoors to see if it can withstand a Canadian winter. Wyze cameras are marketed as indoor devices. Bringing it outdoors opens up a whole new world of opportunity for these cameras. Using a protective housing, I’ll test out this device outside including its WiFi range, ability to withstand rain, snow and temperatures of -30 degrees Celsius or -22 Fahrenheit.
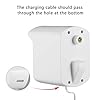
Right off the bat, the housing is plastic and feels like decent quality. The little sunshade is kinda too small to protect against the sun (like seen here) but would definitely help if there is an overhead light. It also works great at diverting rain way from the front of the camera. It may collect bugs and spiders that decide to make a little home under here. I like that it’s colored black to prevent light from bouncing off the underside of the shade and into the camera’s lens causing glare. The mount does twist and swivel so you can install it looking in the desired direction. There is no glass in the housing so the front of your camera (including the lens, photocell light sensor and mic) will be exposed. A glass front would cause the camera’s night vision lights to reflect back into the camera’s lens.


Wyze Camera Wall Mount Bracket, Protective Cover with Security Wall Mount for Wyze Cam V2 V1 and Ismart Spot Camera Indoor Outdoor Use, White (1 Pack) - by Mrount
Let’s get it installed by plugging in the micro USB power cord, then drop the camera into the main part of the housing and attach the back with the included screws. They give you a small screwdriver in case you don’t have one of your own and also include some extra screws. There is no rubber seal and not a lot of overlap between the front and back, but it seems to be enough to keep the rain out anyways. On the back, this area which sticks off protects where the power cord exits the camera and then goes down and out the bottom of the case. Unfortunately, the wire is exposed, and the mount isn’t hollowed out to run the power cable through to its mounting or install location. The wire coating may deteriorate over time since it’s exposed. Oh yeah, someone could cut it with a pair of snips if the camera isn’t mounted out of reach or without zip ties keeping the cord protected against the base. On the bottom of the case, there is a large hole. This is to allow any possible condensation or humidity to dry. I can see bugs making homes in here, but we’ll have to wait until the spring for that. The unit comes with mounting screws and anchors. These are soft screws and will strip easily, so you may want to use your own.
Let’s start off by testing to see if the housing reduces the camera’s WiFi range. Inside my house I am using a Ubiquiti access point with 2.4GHz signal. I have tested multiple areas outside around my house, up to a range up to 300 ft or 94m with the camera covered and uncovered. Long story short, the housing made no difference in the WiFi range. But I will be doing a future video on just the WiFi range maximum distance.


WYZE Cam v2 1080p HD Indoor WiFi Smart Home Camera with Night Vision, 2-Way Audio, Works with Alexa & the Google Assistant, White, 1-Pack
$49.99Next, we’ll install the camera here over my front door. If this was a permanent install location, I’d need route the power cable through the soffit or down the siding and into the house. Let’s do a quick mic test and speaker test. In this location, could even turn the camera around and have it point towards the front door. Or, I could buy another and have 2 cameras since these are perfectly priced.
Next, let’s install the camera here on my Gazebo looking at my house. Just an awesome picture. Before going any further, let’s check out this 24 hours of footage. Just awesome! Since it rarely rains here in the winter, I’ll do a water test with the garden hose today since it’s above freezing. After a minute of some aggressive water hose spraying, the camera is still working as expected. A few drips of water have entered but no damage or signs of water around the protected speaker area. I might have been too forceful with the water, because the photocell seems to have a little condensation on it. The camera still works, but if you want to totally seal the camera, you’ll need to use silicon. Maybe we’ll try that in another video.
I also saw several motion notifications because snow was falling in front of the IR night vision lights. Just watch, as soon as a flake of snow flies by, the camera picks it up. Impressive, but I turned down the sensitivity which helped a little. The only other way to reduce these notifications and to keep motion on is to change the notification to just human detection.
Before exposing the camera to frigid temperatures, let’s bring in the thermal imager. When running the camera inside with the case on, when I took it off, it reached 41 degrees Celsius and 106 Fahrenheit. With the case off all day, it only reached 36 degrees Celsius or 97 Fahrenheit. So, the housing will insulate the camera only very slightly.
My last install location is here, my back step. It’s been sitting here for a few days and it’s almost -22 Fahrenheit (-30 Celsius) outside. Remember, the camera is only rated for 0 Celsius or 32 Fahrenheit. My thermal camera stops giving temperatures at -30. It was -30 and below all week and, the Wyze cam performed beautifully. The camera temperature is slightly above the outside temperature. All the functionality worked as expected including the mic and speaker. The image was perfect and no ghosting or trailers from the cold.
Back here in the studio let’s do a speaker test in a sound-controlled environment. Let’s see if the housing impacts the speaker. Here is a sound sample with the cover off. Here is a sound sample with the cover on. The cover does muffle the sound, but only a very slight amount.


WestCowboy USB 3.0 Extension Cable 15FT, SuperSpeed USB3.0 Extender Cord A Male to A Female for Paystation, Xbox, Hard Drive, USB Flash Drive, Mouse,Keyboard, Card Reader, etc(Black) (15FT)
In conclusion, the Wyze camera quality continues to amaze me given its price point. The protective housing didn’t interfere with the Wifi range and was able to help guard against the elements. We found out that the Wyze camera cam operate in fridge temperatures with no issues. The case did protect against the snow and rain and is definitely an asset if using the Wyze camera outside so you don’t run into any unexpected camera failures and lost footage. I hope this post was informative!