Today I am going to walk you through the steps of building my most powerful PC to date. I’m super excited to have, here in front of me all this top-quality hardware. We’ve got an Intel i9 processor giving me up to 5GHz. Yes. 5GHz. This was my main requirement and everything is built around it. A Kracken liquid cooler, a mother board with the Z390 chipset which I’ll be stuffing with 64 gigs of RAM to make thing purr. I have 2 M2 NVMe SSDs. One for my programs and the other for my operating system which will pretty much illuminate hard drive read and write time. I’ve got a super gaming 8GB GPU pumping out 4K to these 2 huge 32-inch 4k monitors.
The purpose of this machine is for gaming, video editing and photoshop. Let’s start off by walking through my parts list which adds up to over $3kUS ($4020CAD or $3008USD). We’ll chat about the specs, look at some of the problems I ran into and at the end, we’ll check out program load times, bootup speed, some 4k video game-time, do a quick benchmark of those super SSDs.
Parts list for this System:
ASUS Strix Z390-E Gaming motherboard: https://amzn.to/39jQFuM
CPU i9-9900KS 4.0GHz processer (close comparison): https://amzn.to/399evsN
240mm Kraken liquid: https://amzn.to/3boDjyO
Corsair 64GB of 2666MHz Dual Channel: https://amzn.to/2UwGai7
Gigabyte RTX 2070 Super Gaming 8GB: https://amzn.to/2J7nwYL
970 EVO Plus NVMe M2 SSD: https://amzn.to/2QDBe9W
Corsair 750w Gold PSU: https://amzn.to/2WDchzf
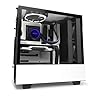
H500 ATX Gaming case from Cooler Master: https://amzn.to/2JcmB9H
4TB Western Digital Hard drive: https://amzn.to/36Y8VKD
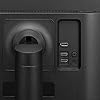
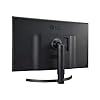
32-inch LG 4k Monitor 32UD59-B: https://amzn.to/2yZ8KSy
Latest 32-inch LG 4k model: https://amzn.to/3gM8ojg
Havit keyboard and mouse & mouse combo: https://amzn.to/2MpoVvz
Comparable SteelSeries Gaming Headset: https://amzn.to/36XFEzv
Logitech Extreme 3D Pro Joystick: https://amzn.to/3duDeLp
That brings me to $3008US. Links to everything can be found above and are from Amazon but, you might be able to find part from other sources (for cheaper) like I did. Let’s start the build process.


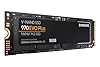
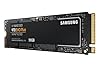

Samsung MZ-V7S500B/AM 500GB 970 EVO Plus M.2 (2280)
With the case laid on its side, we will start off with the motherboard. Since it’s raised a little off the case, we need to put in the stand-off screws. There is a little tool included to make this a little easier. There is one stand-off for every screw hole in the motherboard. Let’s drop in the motherboard and attach it to the case with the included screws.
Next, I like to install the power supply, so remove the cover in the case and drop that into place and secure it using the screws. Let’s feed the wires out the back to get them out of my way. Replace the power supply case cover for now to ensure everything fits fine as we add it. We’ll need to get back in here later to add the power cords for the GPU and SATA devices.
Let’s get started on the CPU install. Here we are on the backside of the motherboard. To install the CPU, first attached the backplate that came with the water cooler. Adjust the sliders as necessary. Flip the board and screw in the stand-offs to secure the backplate. These will be used to mount the water cooler. Speaking of which, let’s stop here. There isn’t a lot of room here between the RAM slots and the top of the case. When I temporarily place the water cooler and fans here, I don’t think the RAM will fit. Let’s get this solved before carrying on.
To install the RAM, open the gates and slide them in evenly until the gate clicks shut.
My cooler’s radiator fans will be blowing the cool air which is taken in from the front of the case up through the radiator and out the top of the case. Just as I expected, when I try to install the radiator with the fans installed, the RAM is preventing the right fan from fitting properly in place. If I loosen the fans, it helps, but isn’t perfect. In the meanwhile, I’ll attach the radiator to the case, from the top. Let’s remove the right fan and chip away some of the plastic shell around the fan. There goes my warranty. Ok cool, looks like it now fits without touching the RAM but frustrating all the same. Get a pic of the clearance between RAM and Fan
With that problem solved, let’s get the CPU installed. Open the bracket, align the notches, lay it in place then close the bracket.
The water cooler already has thermal paste, so let’s place it on the CPU and tighten it up.
There are still 2 wires which need to be plugged into the cooler. First the pump controller and the power connection then the USB cable which is touching the fan, so I’ll need to figure that out. Let’s get the pump wired onto the motherboard using the ATO_PUMP header. The pump’s power comes from a SATA connection from the power unit we already installed. The USB will go into a USB header on the motherboard, like this one here. With this setup, we don’t need to plug in the fan cables since they will get power through the pump.
Let’s get the that USB cable tucked under the radiator fan by removing the fan all together. While I’m here, let’s plug in the motherboard’s power supply. Then put the fan back on. Now for the other power to the motherboard. And let’s take care of this wire and plug in that chassis fan located on the back of the case… into CHA_FAN.
Next let’s get the case’s power button, USB, LED indicators, mic and headphones plugged in. The USB2 is the easiest, let’s route that through the back and connect it. Now the USB2. Now the audio. I made a mistake feeding the wire through here because it is now preventing the power supply cover from sliding off. Now the RGB header cable for the fans. This is a tough one to get on as the holes are very tiny in the connector. Now the panel connectors. Diagram.
Now, to power the front fans. We need a 1amp connector so, I will use the last one here marked M2_FAN.
Let’s add in a SATA module to the power unit for the water cooler pump and fans. Plug in the cable to the power supply and run it out the back. Make the connection and it’s done.
Now, the fun part, let’s install an M2 drive. Pop off the cover for the first one. On the back of the cover there is thermal paste. It comes off easy and tears easily too. Drop in the drive, secure it with a screw and replace the cover.
Now for the GPU. I’ll install it here, in the first PCIe 3.0 16 times slot. Pop off a couple of the back slots. Drop in the card until it clicks and fasten it with the slot screws. To give it some power reopen the power cover and plug in the 8 and the 6-pin power cable.
It’s at this point, I installed a fresh version of Windows 10 on the first M2 drive. It’s not an easy process when there are 2 M2 drives installed. If you are doing a similar build, this is the point where you install Windows. I’ll create another video for that process. We’re almost done the build, just need those other 2 drives installed.


NZXT Kraken X53 240mm - RL-KRX53-01 - AIO RGB CPU Liquid Cooler - Rotating Infinity Mirror Design - Improved Pump - Powered by CAM V4 - RGB Connector - AER P 120mm Radiator Fans (2 Included)
$145.00I said I would install 2 M2 drives, here is where I will install the second. Pop off the over, add a stand-off, drop in the card and attach it with the screw included with the motherboard, then of course, replace the cover.
While we are at it, let’s install this 4TB mechanical drive. Since I am using the M2 slot where I installed the first drive, the SATA port number 2 will be disabled. Let’s plug the mechanical drive into SATA 1. I’ll feed the wired through and put the drive in its rail and slide it in. This is a view of the back of that drive.
That completes the build. I’ll attach metal side cover. And now the glass side panel.
That was a lot of fun! A couple small issues but in the end, I’ve built an awesome machine with tons of horse power. I’m super excited to see what the boot time is. Let’s start it up. There is a 3 BIOS delay, in case you need to enter the BIOS. We’ll start the clock at the Logo. I haven’t played with the bootup optimizations yet and we do have 4 sticks of ram which will add on 3 seconds as the machine needs to recognize each. 6.5 seconds, wow. And, at this point, I also installed all my drives and big programs like Office, Photoshop and PowerDirector.
Time for a little montage to enjoy the beauty of this machine and its LEDs.
Here is a quick look at the system specs from a handy tool that was included with the NZXT water cooler. You can see the i9, 9900KS processor with a default clock speed of 4Mhz, and it was running at over 5Mhz when this screenshot was taken. The motherboard is configured to handle these speeds. The RTX 2070 super gaming card, and its clock speed. The ASUS motherboard with the Z390 chipset. Next, we see those 4 sticks of 16GB RAM. Lastly, the SSDs formatted to 466GB.
Next, we’ll test how long it takes photoshop 2020 to start. 5.3 seconds from a cold start with nothing in cache. Sweet! Cut in half from my old machine.
Publishing 4k videos for my channel here, is about 75% faster than my old i7 PC. Under heavy load, the processor doesn’t get any hotter than 65c (149f) and my CPU is rarely pinned.
Now for some 4K gaming. I am only recording one screen here obviously but colors are awesome. Contrast is perfect. Free Sync is on and the frames are spot on. And check out these stats while gaming. The GPU load hovers around 50%. It bounced to 80 for a second when the game started. The temperature is consistent at 56c (133f). You can see the clock speed and how the fans kicked in when it felt it was getting to warm. This is by far, the best performing card I have ever used.
Let’s do a benchmark on those M2 drives using a cool tool called Crystal Disk Mark.
First the C drive using the NVMe protocol. The first set of number is what we are most interested in here. It’s how fast we can move large files. Nice! Over 3500MB/s on the read side. The third number is how fast we can move small files, around 4k in size. We have over 1100. On the write side, we have over 3200 for large files and over 2600 for small. I couldn’t be happier. Now for the second M2. Very similar results. These are the results I wanted to see. Perfect performance.
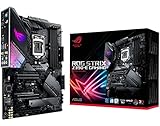


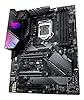


ASUS ROG Strix Z390-E Gaming Motherboard LGA1151 (Intel 8th 9th Gen) ATX DDR4 DP HDMI M.2 USB 3.1 Gen2 802.11AC Wi-Fi
$365.00Already guys, I hope you found this build video helpful including the post-build testing. Even now, a couple months after using it daily, I am still very very excited with it and it’s performing better than I could ever imagine. If you liked this video, let me know with a thumbs up. Do check out the links to everything seen here today in the description and for more Home Tech DIY projects, hit that subscribe button. Thanks for checking out this post.