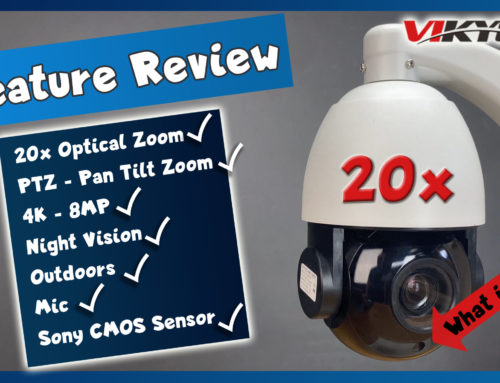
Today, we are reviewing the specifications of my PC and making some hardware upgrades to prepare it for the install of the security camera video monitoring and recording software Blue Iris. We’ll walk through the recommended specifications to run this software, check out my PC’s hardware and add a couple new hard drives to manage and store the footage. Yes, 2 new hard drives. One of which is high-performance.
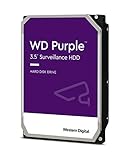


Western Digital 8TB WD Purple Surveillance Internal Hard Drive HDD - SATA 6 Gb/s, 256 MB Cache, 3.5" - WD82PURZ
As you may know, Blue Iris allows you to turn your PC into a powerful video surveillance system manager. This software can be very resource intensive, but with the right setup and Blue Iris configuration, we can avoid performance issues. Today is all about the hardware setup. In my next video we’ll install Blue Iris and walk through the optimal performance settings and run some tests to show their impacts on the system.
Very quickly, I like Blue Iris because it supports a huge list of network IP cameras. If your camera’s brand isn’t listed, Blue Iris works with the ONVIF protocol; it’s a standardized communication forum for IP-based security products. Blue Iris’s has an awesome user interface making it super easy to use and playing back footage to find events is very fast. I also like the advanced features which give me more control of my surveillance system. Anyways, let’s talk hardware.
Blue Iris provides a list of minimum and recommended specs for your PC setup. The software will work with these minimum requirements, but obviously it would be better with the recommended setup, especially as you increase your number of cameras and their resolutions.
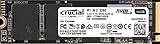


Crucial P1 500GB 3D NAND NVMe PCIe Internal SSD, up to 2000MB/s - CT500P1SSD8
$74.45Given these recommended specs, you could pay about $700 US, without the mechanical drive, which would be an additional $100, plus $70 for the Blue Iris software itself. So, $870. If this is out of your budget, the first thing I would cut is the graphics card, which could save you a couple hundred.
Let’s meet the PC which I’ll be using as my Network Video Recorder. It’s a couple years old and would cost today, about $1200US. It’s definitely beefer than what Blue iris recommends, so let’s look inside.
Intel BX80662I76700K 4512 Core i7 6700K 4.00 GHz Unlocked Quad Core Sky Lake Desktop Processor, Socket LGA 1151
$180.00And as you can tell, there are no other drives installed. I’ll be installing 2 drives to record my footage from Blue Iris. The first drive will be a high performance M.2 NVMe drive to store New footage. As the camera’s live feed is continuously coming into the PC, the machine needs to be constantly saving it and writing to the hard drive. I found in the past that my mechanical hard drive would reach 100% utilization and I was losing footage. This drive should help solve this problem.
After about a day or when this drive is almost full, I want my footage to move over to another drive for store or archiving them for a couple weeks. I selected an 8TB Wester Digital purple drive. I can access the footage here until the drive is full or a certain timeframe is reached. At that point, I will tell BI to delete the data.
Let’s get the NVMe drive installed first. When installing these drives, they often share components with SATA drive connectors. Have a look in your MB’s manual. For me, these first 2 slots become inactive once a SATA NVMe drive is installed. That means these 2 SATA connectors are not going to work. I have nothing plugged in here, but good to know. First, I need to install a stanchion to my motherboard on which the drive will sit. Next, I’ll insert the stick and press it down while I fasten the screw to secure it in place.
When I turn on the PC and open Windows Explorer, the drive is not visible. It needs to be formatted and assigned a drive letter. So, let’s open Disk Management. You can see the new drive shows up. Let’s get it formatted and I’ll call it New Footage. Perfect, you can see it shows up in Windows Explorer. Time to add the purple drive.
These are pretty straight forward. I’ll slide the drive into place and swing around to the back of the computer and plug in the power and SATA cable. It looks good, lots of airflow and space around the drive. Let’s jump back into the PC.
Here in Windows Explorer, the 8TB drive doesn’t show, so we’ll open Disk Management again and the new drive show. We’ll format that one and call it Footage and now it appears in Windows Explorer.
Alright guys, my super-fast NVMe drive and storage drive are installed, formatted and ready for my next video where we’ll be installing Blue Iris, setting up the application for first-time use, and adding cameras of various brands. I’ll also show you a handful of performance tricks to make your machine run as efficiently as possible. Here’s a little early insight. I have 11 cameras streaming in a total of 32MP recording continuously 15FPS and my disk utilization is 1% and CPU is only 10% because I am using the right hardware and performance tuned Blue Iris. Thanks for letting me share Blue Iris’s specs and the details of my dedicated PC for managing my surveillance system. Links to my PC build or comparable parts are in the description along with a link to Blue Iris, if you want to try out a 15-day trial or pickup a license key. As always, I hope you found this helpful. If so, give me a thumbs up and subscribe to be notified when I release my next video.