Today, we are installing and optimizing the security surveillance management software Blue Iris. This software is resource intensive and without the proper configuration, your security camera system may experience errors, lost surveillance footage, crashes or even total failure. If you are new to Blue Iris, welcome because we are going to download the software, install it, buy a license, run through the initial setup steps and add some cameras. I will show you 11 performance tips to optimize the software to keep your PC running at its best. This is a long video, with some great performance examples, so let’s get started.


Western Digital 8TB WD Purple Surveillance Internal Hard Drive HDD - SATA 6 Gb/s, 256 MB Cache, 3.5" - WD82PURZ
For those of you who watch my channel know that I’m a big fan of the video monitoring and recording software Blue Iris. In the past, I’ve struggled first hand with the software’s performance issues, system crashes and coming home to lost footage, error messages and even the blue screen of death. With the latest version 5 and, a clean PC, and a handful of optimization tips, performance is about to change.
I recently restored this PC back to Windows defaults. Check out this video on the steps I followed to wipe this machine so it’s running faster with all the garbage from over the last year whipped out. And, in my very latest video, I just reviewed the specifications for this i7 PC, do check that out too, so you are up to speed on my hardware, including the 3 hard drives I have installed; an SSD for Windows, an NVMe M.2 drive for Blue Iris’ new footage and an 8TB Western Digital purple drive for storing footage as a temporary archive. I could have used the same SSD drive for Windows and new footage, but it was a personal preference to add the second super-fast drive. That’s our first performance tip; using the correct hardware; an SSD and a mechanical drive for camera footage management.
Since this video is about setting up Blue Iris and optimizing its performance, I want to define MY optimal performance. This is a subjective matter with many dependencies, like the PC hardware, other programs installed on the machine, number of cameras and resolution and even expectations of the software. For example, one of my requirements is continuous recording on all channels and I’m going to have 10-15 cameras. Given this, I can expect to have a little higher utilization across resources. Also, I want to say that when resources, like the CPU, hard drive, GPU, Ethernet or RAM get pinned at 100%, it’s important to understand why. Pinned resources can be totally normal, but when resources are overloaded and cannot keep up with the demand, then there’s an issue. If you’re copying a file, your disk is going to work as fast as it can, which could mean it hits 100% (totally acceptable), but if data is streaming into the system at a certain bandwidth and speed and the disk cannot keep up in saving it, because the disk isn’t fast enough, or if it’s also getting used by other processes, then…… well you get the picture, there’s a problem.
Back to my optimal performance: For me, when running an application like Blue Iris on a dedicated machine where no other heavy applications are running, I like to see the total CPU under 60% because it leaves room for spikes. Would I rather it at 30%? Yes, that’s a good target. Would I rather it at 10%? No… because chances are at 10%, I am missing out on quality or frame rates. I like to try to reach 10% and then add features based on my priority to get the quality and experience I want most from the application.
For disk utilization when running Blue Iris, my target is 10% on an SSD. Anything over that should only be seen when scanning through footage. I would love to see 1 or 2% while recording at the highest quality. For mechanical drives, it should only be used when moving data from the SSD or scanning through older footage. I would expect to see 0% most of the time and up to 100% when in use and that would be totally normal. That is the purpose of this drive, it has no dependencies and Blue Iris fully manages it.
For RAM, I would like to see Blue Iris use up to 4gigs.
For Ethernet, it totally depends on the camera count and resolution. I don’t think this is a bottleneck or a concern on a gigabit network.
For a dedicated GPU, I’d be comfortable with running it under 50% utilization before asking why.
If your Blue Iris machine is not a dedicated computer and there are other large, resource intensive applications running, then bringing Blue Iris down closer to that 10% CPU mark might be in your favor if possible. The only way to know is by trying.
Blue Iris does offer a 15-day trial or demo with slight limitations. I have a link to Blue Iris on my website, so we’ll grab it from there. Under Support & Trial/Demo we’ll start the download. I strongly recommend testing out the software first, but be aware, it does have watermarks on the footage, like you see here. While it’s downloading, I’m going to jump into Windows Update Settings and push those system updates out a few weeks. I don’t want Windows updating and restarting my computer without me knowing. This is performance tip #2. We don’t want Windows restarting the machine and Blue Iris not coming back online. I’ve come home to a PC with a Welcome to Windows screen more than once and Blue Iris not running. I actually have a reminder to go into the Windows updates and check if there is any update and do it then, instead of waiting for the new date and getting caught off guard. I’m also going to make sure my power settings are correct and the computer isn’t going to go to sleep. Ok. Looks good. By the way, my PC is connected to my network along with a few IP cameras which I will be adding to Blue Iris, once we are up and running. Here is a quick look at those cameras outside which are hard wired into my basement and connected to my PoE switch. This switch transfers data to and from the cameras and also powers the cameras, so I only need to run one wire to each camera. I do also have some wireless cameras which I will also be adding to Blue Iris today.
With Blue iris now downloaded, we’ll start the install. It wants to do a system check to ensure all the required libraries are present. Since there are C++ files missing, Blue Iris will fix that and install the proper files to get us up and running.
Ok, welcome to the Blue Iris 5 Setup Wizard. I leave the default install location as-is. And that’s it. This is the Activation window. Since this is a free trial, it lists what we have access to and how many days are remaining on the trial. If you click Next, it will ask you to enter a key, but since we are in demo mode for the moment, let’s click Demo.
In this large black area here, this is where our cameras’ live-feed and playback will be displayed. On the left, this is a list of recorded videos. Again, this is not a tutorial on the Blue Iris user interface but rather the initial setup and optimizations. Before we start adding cameras, let’s look at the overall performance tips.
- Up here in the top left-hand corner, click the setting gear icon to open the Blue Iris settings dialogue.
- I’m going to give my system a name. Home Tech DIY
- Let’s click on the Register Now button to get the software registered to avoid watermarks (like this) and to have full access to important feature Direct to Disc, which we’ll discuss soon. I’m going to click the Buy Now button on my web page and purchase a license key for Blue Iris. A key can be purchased through Blue Iris but feel free to pick up the license through my site. Blue Iris does throw a few cents my way when you use my link. I’ll enter in my key and, bingo! Let’s continue the initial setup.
- Let’s jump over to the Clips and archiving tab where we are going to take advantage of my performance hard drive setup which we installed and formatted in my last video. Configuring this performance hardware correctly is tip #3.
- This screen is divided into 2 main sections. First, the database. Like the note says, this and New files should remain on Local and fast drives. That means within the PC and not on a NAS or remote machine. The database is used internally by Blue Iris for files and systems management. I want the database to be placed on my NVMe drive. Let’s create a folder called db for database.
- The second section here tells Blue Iris where we want to save footage from the cameras. This footage is classified as New, Stored, Alerts and Aux. Starting off with New files. This is where the live camera feeds are getting recorded. These files will be constantly growing very fast, which is why I want them on my highest performing drive. So, I’ll create another new folder called New. I’ll dedicate 400GB of this drive to New files. I’ll also set an age limit to 1 day. When either of these triggers are met, we have some options; Delete, Recycle or Move the footage. By default, it’s set to move the new files to Stored. Let’s jump over and specify the limits on these files.
- I want to keep my Stored files for a couple weeks on my 8TB drive. I’ll create the folder. We’ll designate 6TB. I might bump this up in the future, but we’ll say 6 for now. I’ll remove the age limit so we fully use that 6GB on my drive.
- I’ll configure the Alerts folder here but I won’t be using it for the time being. This is for things like motion detection, but I’ll be recording continuous and won’t need it for now. Once I hit 10GB or 1 day it will move these files to Stored.
- Click ok to conclude the basic setup.
- Now we are ready to start adding cameras, I have already collected all the internal IP addresses for each camera.
This involves logging into each camera and looking at the network configuration. In this Hikvision example, I don’t use DHCP but rather a static IP address. Here it’s 192.168.0.77. This address will never change since I programed it here. When looking at the ports, I try to keep them in sync with the IP address. Here I will need to remember the RTSP port of 777.
- Back in Blue Iris, right click in the large black space or click the + icon in the upper right to add a camera.
- Let’s give the camera a name: House Front
- Keep audio disabled for this camera.
- Disable motion detector because I’m setting this up right now.
- Select Direct-to-disc as a performance benefit so the incoming footage is left raw and not encoded. With this option, Blue Iris cannot create overlays, so if you want the date on the footage, the camera will need to be configured to do this. On my i7 processor, the option saved me 1-2% on my utilization per security camera.
- Let’s enter the camera’s IP address on the internal network.
- Enter the password for admin.
- Select Hikvision as the Make and the model can be left as is for this camera.
- Update the RTSP port to 777.
- Click ok to confirm and set the remaining camera properties.
- For my next tip, I like to change the max recording frame rate to 15. This is the same frame rate I have specified in the camera’s user interface. Using any higher doesn’t provide much of a noticeable different in the video smoothness. For the disk and CPU savings, I would keep the frame rate around 15. If the CPU does run into issues and is getting pinned, lowering the individual camera’s frame rate even further might be a good resolution.
- Lastly on the Video tab, I like to disable “display overlays live” since we aren’t using this anyways.
- Over on the Record tab, let’s set this to record all the time or continuous.
- Since we are not recording just when motion is detected, we don’t need pre-video from before the trigger, so I’ll turn this off.
- Combine or cut video is an interesting setting. If we were recording on motion, each event would create a file that gets joined to the next motion event, so in the end you would have one file and not a bunch of files. In my case, where I am continuously recording, I don’t want huge files and risk corruption or having to move around large files if I need to export footage. It’s not an optimization tip but rather a personal thing that I like to keep them relatively small so I can search through them quite quickly. I’ll set mine to 2 hours or 4GB. This means that my 2-hour files will appear in chronological order in the clip window on the left which holds about a day’s worth of footage with a thumbnail for each. I can quickly see which 2-hour file I need to open, just from the thumbnail. If my files were 8 hours long, there is a higher risk that the thumbnail wouldn’t show the event I’m interested in because it had already come and gone. Let’s jump ahead in time and look at an example. I have already adding the camera and have my 2-hour blocks of recorded footage on the left. I can see the truck in one thumbnail and not the next, so I know exactly in which 2-hour timeframe I need to look to see when the truck arrived. After some quick scanning, I found it, it was me driving it.
I’ll finish adding this first camera by clicking ok and there we have. A perfect view of the house from the front yard. Yes, I have underground cables running from my house to my fence in order to get this awesome out if view. And I even created a video of setting it up for you to check out.
I’m going to power through and add another Hikvision camera. So, let’s fast forward here.
Now to add another camera, this one is a Reolink camera that is of course plugged directly into my network using a PoE switch. This time, I’ll select Reolink in the Make dropdown.
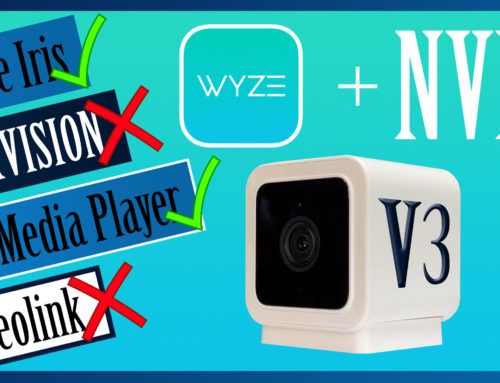
The last camera I’ll add for this video is a Wyze camera which the firmware update which I already presented on this channel. The user is actually Admin with a capital A. The path is actually /live here, so let me change that.
Ok, and that’s the 4 cameras and check out these quality images. We’ve got Dash on the cat tower just chillin. Let me fast forward and run out the front door and then to the back door. I’ll zoom in on the Reolink camera. Very cool.
Let’s pop open the task manager and see if there are any obvious issues. Let’s stop right here. Blue Iris is using about 16% CPU, not even a gig of RAM, 2Mbps of disk, which is nothing, and 16Mbps on my network, again nothing. Just below, my screen recorder to capture this is taking up 10%. I couldn’t be happier. But we’re not done yet. If your machine is struggling with 4 cameras at this point, let’s look at some more tips to improve that performance. I’m going to add more cameras for a larger performance impact and check out those tips.
Since we are going to be talking CPU, notice there are CPU and RAM indicators in the bottom right to how the resources being used by Blue Iris. I found RAM to be an accurate reading. CPU on the other is not always accurate. Please ignore this unless it’s been calibrated to the system’s CPU utilization in the task manager. To do this, go to Setting, Other, Advanced, CPU usage factor. For now, I use task manager as my performance indicators.
As you just saw, I have 11 cameras added and recording. Remember, when adding each of these cameras to Blue Iris I matched the number of frames per second for each camera at 15 fps. On a similar note, there is a global setting for the frame rate of the display only, which could provide relief to the CPU. This is my next optimization tip and in this example, each camera is displaying and recording at 15fps and Blue Iris is using close to 50% of the CPU. If I go to Blue Iris settings and on the Cameras tab, I can verify that the feature is off. Let me run outside and show how smooth the video is. Now, my screen recording software is a little choppy here so the video isn’t perfectly smooth, but it’s good enough for this example. Let me change the display fps value to 5fps. The CPU drops from 50 to 30 and there is very little impact on the image displayed. Let me run outside again on this -30-degree day and show the difference. The CPU savings are fantastic given this performance tip only impacts what is displayed on the screen and not the image which is recorded. We are still recording at 15fps.
Let’s reset and move on to the next example and tip, sub streams.
The CPU is up around 53%, the RAM is up to almost 3.5gigs, my NVMe drive is still not even noticing an impact at 0% and the network is at 37. You’ll also notice that the remote desktop host on this machine is eating up 18% CPU. We’ll deal with that soon too but next we are going to talk sub streams. If we right-click on a camera’s channel and look at settings, there is an option here under Stream profiles called Sub. As you may know, security cameras capture 2 or 3 live video feeds. A main one, which is high quality and a lower quality one which uses less data. If you log into your security camera, you can see the setting for each of these profiles. Blue Iris has the option of showing the live feed in lower resolution to save on system resources but it will still record the high-quality image in the background, this just impacts live feed display. The main, high resolution video is still recorded in the background but there is no need of seeing 13 tiny HD feeds. When you have a lot of cameras and viewing all the live feeds at once, the smaller sub feed might provide enough resolution for viewing.
I’ll fast forward through these updates. If you don’t know your camera’s substream address, you can Google “rtsp substream + your camera brand”
After updating all the cameras, you can see a slight quality loss in each of the channels, but check out the CPU and RAM savings. We were at 53% but now at 9. The RAM was at 3.5gig and is now showing almost a third of that value.
If you are using this feature and you want to view a particular channel, full-screen, double click the feed and you will be presented the sub stream for a second and the main stream will take over giving you the camera’s best resolution live. Pretty cool!
We can actually take this sub stream tip a step further by using a feature called Record dual streams. It’s basically the same thing as tip7 but with recordings. This performance tip takes advantage of the camera’s sub stream profile by recording the lower resolution feed, then when we want to playback multiple channels at once, the system is not choking on large files. The larger files are still there for export or viewing solo. To set it up, go to the camera’s setting, under Video, Configuration, setup the Sub stream, then on the Record tab, check the feature here. So how is that a resource saver? If I play back all 13 feeds at once and start scanning through the footage, the disk needs to pick up the files and the CPU will need to process it so you can see it.
19:55 Let’s check out an example with this feature off, so no sub stream was recorded. Each channel playback is going to be displayed its highest resolution, which totals 32megs over 13 files (one per camera for every 2 hours). I’ll click on the blue timeline to show some recent footage. I’ll slowly start dragging. The CPU is getting pinned and the footage is not smooth at all, and quite laggy and choppy. It’s better to click different time than drag the timeline. The drive which contains this footage, the NVMe is showing minimal utilization. The CPU is the bottleneck and struggling to process all this data I am requesting. When I look at older footage, we are now accessing the 8tb drive and the drive it’s even more choppy. Again, better to click times instead of dragging when requesting so much data at once.
When I double click on a camera, I see the footage full screen. Sliding the timeline and viewing this older footage from the mechanical drive, the disk and CPU have no issue keeping up. The full screen playback like this will always show in full resolution even with the recording sub stream turned on. The major lag comes into play when you have many cameras.
Now, with the sub stream recording turned on, each channel will only be displaying .1 or .2 MP each totaling about 2MP total. The playback display files are lower quality when viewing multiple channels at once. Lower quality means smaller files and less strain on the CPU. Here we are playing back recent files from the last 24 hours from the NVMe drive. I can scan through much more footage with less skips and lag than with this feature off. The NVMe drive is getting much more use and a lot more footage is getting processed. The CPU is still the bottleneck but I can scan through a lot more footage using this feature. If I go back a couple days, you can see I’m accessing footage from the mechanical drive and as I hit 100%, it’s choppy but nowhere near as bad as when this feature is off. Defiantly a performance feature I see myself using.
I tried this test directly on the PC without Remote Desktop and the graphic display hovered between 40 and 50%. This was the only occasion where I saw more than 15% from the GPU across all my testing.
As with the previous tip, when I double click on the feed, I’ll see the full resolution playback. Again, this feature is just for the display playback and doesn’t impact the high-definition recordings.
You probably saw that I use remote desktop to access this PC. This allows me to hide the PC anywhere in my house where I have a wired network connection; so in any room or even my garage. I can the access the machine over remote desktop and keyboard, mouse or monitor are required. Remote desktop does impact the CPU however. For this PC, it can add up to 20%. Let’s check out a cool tip on settling that down. In Blue Iris’s main settings, on the Cameras tab, we have a setting “Video during Remote Desktop”. The setting “5-sec update” will update a snapshot of the live feed every 5 seconds. It does not impact playback or regular navigation. The option, “Unrestricted” provides smooth video when RDCing into the machine however it will add 10-20% to the CPU utilization and additional data over the network. Here is a look at my processes using “Unrestricted”. The live feed is screaming in and we can see the clocks changing every second. But the CPU is very high. When looking at the processes, Remote Desktop is chewing up 16-17%. If Blue Iris is already using 50-60%, there’s not a lot left over. If I change the setting to “5-sec update” the live feed clocks are updating every 5 seconds and the CPU has dropped off. The PC is still recording all the footage as before (every second of it). We have just turned down the refresh rate of the cameras on the screen. Over on the Processes tab, (Check this out!) RDC is now less than a percent and Blue Iris is down to just over 40%. That’s a CPU saving from 82% down to 42%. (An amazing feature for sure) It’s a great CPU saving if you have your PC running over remote desktop, and again, the playback is not impacted by this setting, so there will be no playback delays. Not sure if you noticed, but there was also a data saving through the network as well from 12Mbps to .3. Cool stuff.
Our next tip is about Intel’s QuickSync. Back here on the Blue Iris setting page, right below the Remote Desktop refresh rate, we have a setting for Hardware acceleration. This allows Blue Iris to take advantage of Intel’s Quick Sync Video within the processor. This will aid lower CPU utilization if the processor supports it. As we saw in my last video, my i7 does support QuickSync. For this tip, I am not using remote desktop but a 4k monitor connected to the machine’s graphics card.
For our last tip, number 11, we are going to hide Blue Iris. We can actually hide the user interface and have the program run in the background as a service in Windows. In this scenario, my CPU utilization is about 47% in total and Blue Iris is using 37%. When I go to Blue Iris settings and on the Start Up tab, I can select to run as a Windows service. I enter my Windows password and click ok. Blue Iris will want to restart. I’ll restart it and then shut it down again. If I open Windows’ services, I can see the newly added Blue Iris Service. The application is running in the background and in Task Manager, you can see it’s using only 22-25% of the CPU. Much better then the 37% we saw moments ago. To access Blue Iris’ user interface, simply use the desktop icon to open the application. This is a cool feature, especially if I didn’t need to be constantly monitoring my cameras, like if this PC was not a dedicated machine and I had other work to do.
One last thing. It’s just after 4pm and it’s time for Blue Iris to move files from the NVMe drive to the mechanical drive. The NVMe drive is also continuing to record footage coming in. Notice the disk utilization is up on the E drive and at 100% on the 8TB drive. This is not an issue and Blue Iris is managing the disks perfectly. Let me speed up this clip and you’ll see the disks trail off as it finishes moving the new footage to storage or archive.
So, after sharing all these tips, what are my optimal settings? Well, let’s take a quick refresher and scan through the tips.


Crucial P1 500GB 3D NAND NVMe PCIe Internal SSD, up to 2000MB/s - CT500P1SSD8
$74.45
Intel BX80662I76700K 4512 Core i7 6700K 4.00 GHz Unlocked Quad Core Sky Lake Desktop Processor, Socket LGA 1151
$180.00That said, let’s check out how my dedicated machine performs over remote desktop which is its permanent state. My CPU stays around 25% and my RAM is using about 14% of the 32gigs installed. My NVMe drive hovers between 0 and 4%, unless it’s moving files or I’m scanning through playback. The mechanical 8TB drive is at 0% most of the time, unless Blue Iris is moving around files or I’m scanning footage, which then it will hit 100%. The graphics card runs at about 15% all the time, even though remote desktop. As you can see, RDC actually eats more CPU than Blue Iris, so when this machine isn’t being accessed, and I’m not watching the live feed, the utilization is super low, about 10% CPU.
This machine right now, with remote desktop running, at 25% CPU uses about 132w. When RDC is not running and I am using the machine’s HDMI connection to view the live feed, the CPU is at 10% and I’m using 102w. Lastly, when the CPU is pinned at 100%, because I’m scanning through footage, it will burn over 200w.
Alright guys, thanks for hanging out to learn about my performance tips. We got Blue Iris installed, licensed, updated global performance settings, added some cameras and tested their optimal settings. These options are a game changer for surveillance recording. Blue Iris is constantly getting upgraded and tweaked for even better performance. Please share any performance tip you may have in the description below. If you want to check out the Blue Iris 15-day trial, or even purchase it, please consider using my link below. If you have an additional Blue Iris performance tip, I’d love to hear about it in the comments. As always, let me know if you like this video with a thumbs up and hit that subscribe button for more home tech DIY projects that you can do yourself. Thanks for watching.