Today’s topic is security camera lens sizes. I’ll show the difference between a wide angle 2.8mm lens all the way up to a 12mm zoom lens. In particular, I’ll review camera footage, the difference between fixed and variable lenses, the math behind lens sizes, zoom multipliers, sensor size impacts on viewing angles, minimal focus distances and lastly, we’ll check out if the lens size has an impact on the camera’s infrared night vision. All that should provide you with everything you need to know about security camera lens sizes.
These 4 8mp cameras have different purposes because of their fixed lens size. When I say fixed, that means the lenses don’t move. There no zooming in or out and no way to change their focus. Their fields of view or their coverage area is constant. Another name for these would be mono-focal cameras. We have a wide angle 2.8mm, 4mm, 6mm, all the way up to a zoom camera with a 12mm lens. This fifth camera has an internal lens which does move. Its zoom level and focus are controlled through its app and it’s called a varifocal camera. Before going any further, let’s check out some examples.


8MP IP PoE Outdoor Bullet Camera DS-2CD2T85FWD-I8 4mm 4K Onvif IP67 Waterproof 262ft(80M) IR Range PoE Security Camera with SD Card Slot 8 Megapixel Network Day/Night Video Surveillance Came
(as of May 13, 2024 20:00 GMT -06:00 - More infoProduct prices and availability are accurate as of the date/time indicated and are subject to change. Any price and availability information displayed on [relevant Amazon Site(s), as applicable] at the time of purchase will apply to the purchase of this product.)Here on my front step, I have all the cameras pointed out my driveway. Let’s jump into the fixed lens camera with the 2.8mm lens. The purpose of this wide-angle lens is for coverage but not so great on details in the distance. I’m just over 75ft (23m) away here. You can see what I’m up to, but you cannot easily recognize facial features. These details don’t appear until I am about 30ft (9m) away.
Moving to the 4mm camera, you can get a little more detail at this distance, but the field of view has slightly decreased. The finer details become visible just a few feet sooner.
As the lens size gets larger, here in the 6mm lens, more detail is available at this distance. At 50ft (12.25m), you can easily see facial and license plate details but the surrounding area is no longer recorded with this camera. The purpose of the 12mm is to pull in details from a distance. The details are perfect but there are a lot of other things that could be happening around the driveway which are not getting recorded. So which camera should I install here in this location? Ideally, I would install both the 2.8mm camera for its wide coverage and the 12mm for the extra detail at my driveway entry point. If I could only install 1 camera on this long driveway, in this situation, it would be the 6mm camera because I get wide enough coverage and details are visible within 50ft. Within 30ft I have awesome detail and the camera continues to provide a perfect picture until I am 5ft from the device.
The trick is finding the right size lens that gives you the coverage you require.
Let’s jump into the lower resolution, 5MP, varifocal camera. At its shortest lens setting of 2.7mm, we again, have a very wide angle with great coverage. The license plate is attached out there to the fence post. When I zoom in to 12mm, the camera focuses and you lose the surrounding coverage but gain an awesome image of the center of the frame. Here is a side-by-side of both wide and zoom.
We’ll move onto some nighttime footage with each of the cameras, continuing with the varifocal camera. We have good coverage of the driveway and even in the area off to the left. Those flakes you see are not ghosts but actually ice crystals in the air getting reflected back into the camera from the infrared night vision lights. Ice crystals are common here in the prairies when we reach -20 Celsius or -4 Fahrenheit. Here is a view of the camera when zoomed in at its max when it’s pitch black outside. And here are individual shots from the other 4 fixed lens cameras at night. Please note that I’m showing night vision just so you get an idea of what to expect for each lens but there are a lot of variables affecting the image quality such as the level of darkness, brightness of the camera’s night vision lights, quality of the camera sensor and the size of lens aperture or how much light it allows into the camera. There are also lighting setting you can tweak in the camera’s internal interface to adjust depending in your setup.
These are bullet style cameras, and the lens principles apply to all types (domes and turrets). Be sure to check out this video if you are looking to choose which type would be best for your situation.
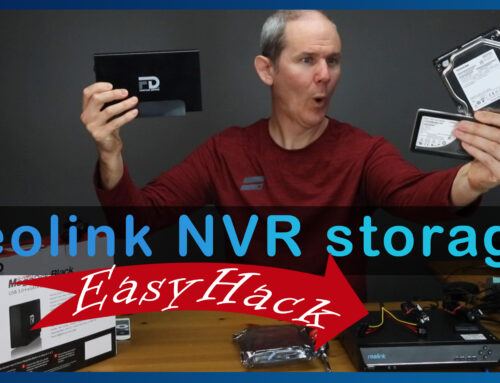
On the front of the camera, we have the lens, if we unscrew it and remove it, this is what it looks like. These are not meant to be removed or interchangeable. They are usually sealed and if you break that seal it’s very challenging to re-focus the camera.
A camera’s lens size, is also referred to as the focal length. This is the distance between the back of the lens and the camera’s sensor, and it’s measured in millimeters. As you may know, the sensor is the electronic device onto which the lens projects its image where it’s digitized. By comparison, there are 25.4mm in 1 inch, so when we talk about 2.8mm, we aren’t talking a very large space.
Let’s chat about varifocal cameras a little more. As I change the distance between the lens and the sensor, you can see two things happening. 1) The field of view is becoming narrower and 2) the camera needs to re-focus to ensure a sharp image at the new focal length. This is an advantage to varifocal lenses over fixed lenses, as we’ll see shortly when we test the minimal focal distances.
These can be a great option if you don’t know what lens size to buy or you will be moving the camera to various locations with different lens size requirements. These also work well if you want to zoom in on something within a short distance from the camera. Note however, that zooming in and out can be a little time consuming, especially at night when the focus speed is reduced.
When shopping for a varifocal camera, you may see them advertised as 4X zoom, or 10X zoom or 25X or whatever. This 25X zoom camera from Hikvision has a focal length from 4.8mm – 120mm. It’s called a 25X lens because 4.8 X 25 is 120mm. 4.8 is 1X and 120 is 25x. It’s another way of wording the camera’s optical abilities in a less tech savvy manner. Let’s jump into this camera and check out the widest point of view all the way to the narrowest.
There is another factor which can influence your viewing angle. The size of the sensor. The larger the sensor, the wider the viewing angle. I don’t want to dig into the trigonometry but if the lens is a fixed distance from the sensor and there are various sizes of sensors, in order for the lens to project the image onto the entire sensor from the same lens distance, the projection angles would vary. In this example, we have a lens, sensor and there is a 2.8mm space here. This is its focal length. Next to it, we have another camera with a larger sensor. When we have a larger sensor, we have a larger viewing angle for the same lens size and therefore the field of view increases.
These four 8MP cameras with 1/2.5-inch sensors, here are the viewing angles for each.
“we have a 101-degree horizontal viewing angle and 82 vertically using the 2.8mm lens. The 4mm lens will give you close to 79 across and 62 degrees up and down. 50 and 37 degrees for the 6mm and 23 and 18 for the 12mm.”
The varifocal camera has a smaller sensor, and using the lens at 2.7mm from the sensor, it has a viewing angle of 90 degrees, but at 12mm, the specification indicates 31 degrees.
When selecting a security camera, knowing the viewing angle is more important than knowing the lens size. For me, the lens size gives a ballpark figure of wide angle or zoom. The viewing angle is an actual measurement dictating your coverage. Using this number, you can calculate if you are going to capture everything in your scene from your camera install location. Most manufacturers do have this specification available on line. However, some actually do not include the viewing angle so you are left guessing the viewing angle based only on lens size. Like in this example here.
There are online calculators to help figure out the viewing angle if you know the lens and sensor sizes. But there are a few factors which can influence this calculation.
- Lens variations from manufacture to manufacture.
- Manufacture rounding where a 11.7mm lens might be called a 12mm.
- Sensor crop, where the image projected onto the sensor is larger than the sensor itself.
The exact viewing angle, gives you the exact coverage to expect.
Let’s check out an example. On this site, they tell you the lens sizes and the viewing angle. Knowing 80 degrees is your horizontal viewing angle, you can figure out your coverage. If you want to do the math (I said I wouldn’t but let’s look at one example), let’s say your camera will be 20 ft away from the middle of the scene. The viewing angle is 80 degrees. This line is what we need to calculate. It’s going to be our viewing width where the viewing angle intersects. I need a 90-degree angle for trigonometry, so let’s cut the viewing angle in half to make 40 degrees. Tan 40 degrees. Multiply it by my distance of 20. Now I have half of my width of 16.8. Double it to get a 33.5ft horizontal surveillance width. Here is the expected viewing width from 20ft with an 80-degree viewing angle. To avoid the trig, you can use this cool interactive tool to help figure out these details when planning your camera layout and their view angles. The link for this tool is in the description below.
Let’s look at more examples.
My next test location is here, 12 feet from my back door. Starting off again with the varifocal. Coverage is a little too wide for this distance from my main subject area; the doorway. When I zoom, it’s a little too close. In this situation I would probably set up the camera at about 2X.
Here from the 2.8mm fixed camera, it’s almost too wide. The space off to the right is a little too much. The 4mm is much better for this install location given the close distance the doorway. The 6mm is a good option too. I would go with a 4 or a 6 here and installed in the upper right cover of this covered deck without spilling over onto the yard would be ideal. In the 12mm, we are too close and the image in a little blurry. Let’s check out how the lens size affects the minimal focal distance of each camera right after we check out some night vision shots from this location. First the varifocal camera. Now the fixed lens cameras.
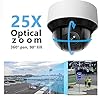


4MP PTZ PoE IP Dome Camera OEM DS-2DE4A425IW-DE, Outdoor PTZ DarkFighter Speed Dome Camera with 25x Optical Zoom, 360°Pan & 90°Til,4.8~120mm Lens,165ft Night Vision,Audio&Alarm I/O,WDR,MicroSD 256GB
$409.00This is a minimal focal distance test. If you want to buy a security camera to monitor something close-up, like a bird feeder or honey bees or a close up of flowers or even a doorway, ensure you look up the camera’s minimal focus distance. The basic rule for fixed cameras lenses is, the shorter the lens, the less space you need to hit your minimal focus.
Here are the minimum focal distances for each of these fixed lens cameras.
2.8mm – 16in(41cm), 4mm – 32in (82cm), 6mm – 5ft (1.5m), 12mm – 32ft (9.75m)
Notice the 12mm camera’s distance is 32ft (9.75m) before it can focus on its subject.
Since the varifocal camera has an adjustable zoom and focus it gives this camera an advantage by giving it a very short minimal focus distance. I can focus on the plate when I touch the plate against the camera. I can even zoom in all the way and the camera will still focus with the plate touching the lens.
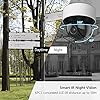
Let’s look at how the lens size can affect your camera’s night vision. I pointed each of the fixed lens cameras at my garage door from 5 feet away. Here is a look at their lighting patterns. The camera with the 2.8mm lens has much wider light coverage compared to the 12mm camera. Here is a look using the varifocal camera. Notice it has a good wide coverage and a hot spot in the middle for when we are zoomed in.
I can get a cross section by laying the cameras on my deck and filming them from another camera above. For the varifocal camera, it has 2 sets of IR lights; one for wide and one for zoomed in. Looking from that camera’s point of view, we can see the two distinct sets of lights. As I zoom in, the lights do not change. I like this setup because when using the wide point of view, the camera throws extra light for objects far away and when zoomed in, you can also take advantage of the extra light. Now, looking at the 2.8mm IR spread, the 4mm, the 6 and the 12. The IR projection angles are very obvious and are shaped to better suite each lens size. Let’s now look at how the 25X camera deals with IR light at various zoom levels. Here at its widest we have a good spread of light, with some decent light in the middle for things far away. When I zoom in, the brightness in the middle intensifies to better see objects at that range. Here is a quick replay. Pretty cool feature but this camera is about $800.


MokerLink 10 Port PoE Switch with 8 Port PoE+, 2 Gigabit Uplink, 96W 802.3af/at PoE 100Mbps, Fanless Plug & Play Ethernet Switch
$38.78Make sure to check out my detailed reviews on all of these cameras, even the 25x zoom camera with tracking. Also have a look at my planning video if you are looking to get a new system up and running. In summary, the lens size number you find in a security camera’s specification is just a starting point on its coverage. In short, the small the lens sizes, are great small area like garages, small city lots, doorway and porches. With larger lenses you’ll gain detail but lose out on coverage; great for long driveways, garden gate, or any area of interest in the distance.
I hope you found this information helpful in helping to understand what a camera’s lens size is and all of the influencing factors. Links to all the products will be below including the PC recording software Blue Iris which I used to record all the footage. Please let me know if you liked this by giving me a thumbs up and subscribe for more Home Tech DIY projects you can do yourself.