Today we are checking out a totally wireless security camera from Reolink. It the Argus 2 and has an optional solar panel. I’m super excited about this setup because it allows me to install a security camera pretty much anywhere as long as I’m in WiFi range. We’ll see what’s included, add it to the Reolink app, install it in a bunch of locations inside and out so you can get a good feel as to how this camera could work for you. I’ll show tonnes of daytime and nighttime footage, do a water test, WiFi range test and whatever else I can think of. Basically, everything you need to know to understand this camera’s flexibility, so be prepared for a lot of information!
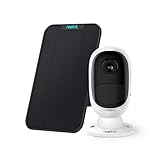


REOLINK Outdoor Security Camera System – Wireless, Rechargeable Battery, 1080P Video, Night Vision, Motion Detection, 2-Way Talk, Waterproof, Support Cloud Storage | Argus 2+Solar Panel
So, you can pick these up for individually or together as a package. The camera is about $100US or as a combo for $120. They go on sale, so keep an eye out for that. I have a link to coupon codes in the description below for even more savings that can be stacked on top of their sales, so do check that out.
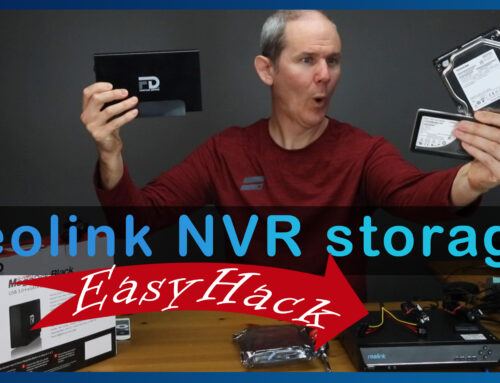
The solar panel, is very straight forward. It comes with another window sticker, mounting template, setup guide, metal mount, screws and 4.5m (almost 15ft) cables. The connector has a water-tight seal. As you may know, the panel doesn’t power the camera but rather keeps the battery topped up and the camera uses this power bank.
REOLINK Outdoor Security Camera System – Wireless, Rechargeable Battery, 1080P Video, Night Vision, Motion Detection, 2-Way Talk, Waterproof, Support Cloud Storage | Argus 2+Solar Panel
Let’s bring up the feed and do a quick lag test. Not bad. Less than one second.
I’m going to up the quality to “1080p”, so I am seeing the best image possible since I know I have a strong WiFi connection.
Here is the icon of the movie camera I was referring to so you can record video to your phone. You’re limited to the space on your phone as the footage goes directly to your camera’s video storage. I have also noticed on a couple occasions, the audio gets out of sync with the picture when recording footage like this.
Let’s go through the install process here, inside my garage. The solar won’t work here obviously unless I run a wire outside. The camera just sticks onto the magnet which is super convenient. Let me rotate the image here. Here is a look at some footage. Let me open the garage door to see how the camera deals with the light change. Looks like it handled it very well. Now at night with nothing but the camera’s IR lights. Very impressive and no ghosting or trailers. Perfect footage.
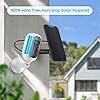
My next location is here over the front door. I’ll fast forward though the install and point the camera towards the driveway. Let’s also install the solar panel and plug that in. I love the seal it creates around the solar plug. Totally weatherproof.
The view is perfect. Wide enough so I can see the whole driveway. I can even see my garage doors and I can see if they are opened or closed. Nice colors and good image quality.
Let’s do the license plate test, starting at 75 feet away. It isn’t until I get to about 25ft away, that you can easily read the plate.
At night, it’s pitch dark in this wide-open space, it isn’t until I’m 20 feet away before you can easily see features. This is impressive. Other cameras often have blinding IR lights that wash out the scene at this point.
Let’s format that SD card and setup motion recording.
- Go to more settings
- Select Storage
- Format the card
- Now back on camera recording, we’ll select 15 seconds of footage when motion is detected.
We’ll need to turn on the PIR sensor here. Under Alarm – PIR Sensor – PIR Settings. You can change the sensitivity from High, Med to Low. You can also turn on a 3 second alarm, and even get an email (with a picture) when motion is sensed. Lastly you can tell the camera to turn on and record the event for a custom length of time. Let’s make sure push notifications are on, so I get notified when the PIR is triggered. This is what it looks and sounds like.
Let’s turn on the optional alarm. It’s not too loud, but it will attract someone’s attention, letting them know they are getting recorded.
When testing the PIR sensor, I received a notification when I was about 10ft or 3m away. I like that I can then jump into the app’s events and playback the footage that triggered the alert. The trigger area seems to be a straight line perpendicular to the camera. I like the quick wake up time. As soon as the PIR senses motion, the camera wakes up, starts recording and then turns on the alarm. Pretty cool. By the way, I did PIR testing at night too and the sensor seemed a little more sensitive.
Back on the solar panel. After a lot of testing, the solar panel doesn’t seem to require direct sun. The camera is at 100% and it’s at the freezing point here for the past few days. The camera seems to be getting the juice it needs to stay topped up. On the other hand, when it’s below -5 Celsius (23 Fahrenheit), the camera worked just fine but the battery was at 91% for most of the day (even in the sun). The solar panel didn’t top up the cold battery.
With the camera turned around and facing the door, the wide-angle lens provides a perfect view.
At night, you can see that the IR lights are off on the camera. When I open the door, the camera wakes up. Let me wave to the camera. I see my alert and let’s go back and play it. So, you don’t see me opening the door, so it takes about a second for the PIR sensor to wake up the camera. Not bad considering this is an awesome energy savings for the battery.
Let’s quickly install the camera here over the door. If I have no access to power or network cables out here, this camera would solve my problem. You can screw the outdoor mount into the soffit. If I were to install the solar here, I would tuck the wire into the corner edge and attach the panel to the eave.
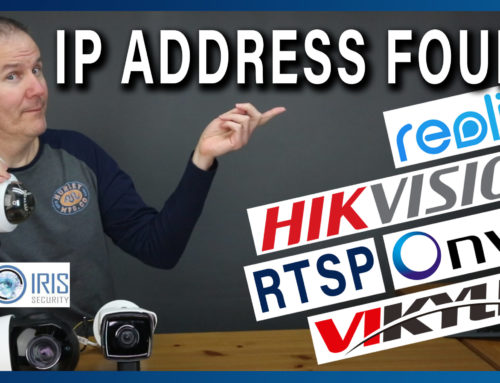
My next test is the back-yard range check. Let’s see how far I can walk with the camera in hand and continue to keep WiFi contact. Inside I have a Ubiquiti access points on my main floor. I did a video on these a while back and they are still going strong.


REOLINK PoE Outdoor Security IP Camera 4X Optical Zoom, Auto-Focus 5MP Video Surveillance, Work with Smart Home, IP Security IR Night Vision, Motion Detection, Remote Access via Phone App, RLC-511
So, what didn’t I like about this camera? Well, not much. The PIR sensor zone is a little short. I’d like to see that at a consistent 20ft or 6m. I also found the mic picked up the slightest breeze and ruined the audio. Maybe some internal foam or material for a windscreen could help. I also found that the outdoor camera mount conveniently only had one tightening spot, it didn’t always fully secure the camera.
What did I like? It’s a stand-alone device and all you need is the camera, solar panel and a memory card. No computer or Network Video Recorder is required. I love the image quality in the day and night, the wide view point, the fact that I had next to no false alarms with the PIR sensor including changes in lighting conditions and snow falling in front of the camera. The onboard storage is prefect and connectivity was flawless. The solar panel and long battery life makes this a game changer to security cameras. Especially because it works during a power outage. It’s a perfect, very well priced, DIY solution and removes the frustrating limiting factors of running network cables up walls, across the floor or through the yard.
Again, check out my links below for more information and check for coupon codes there too that can be stacked on top of Reolinks sale products. I know this was a long video and a tonne of information. As always, if you liked this video give it a thumbs up to let me know, and please subscribe for more Home Tech DIY Projects.