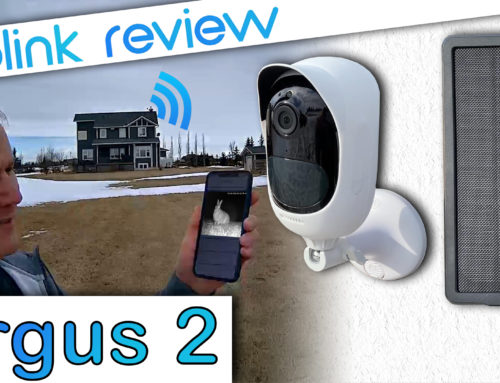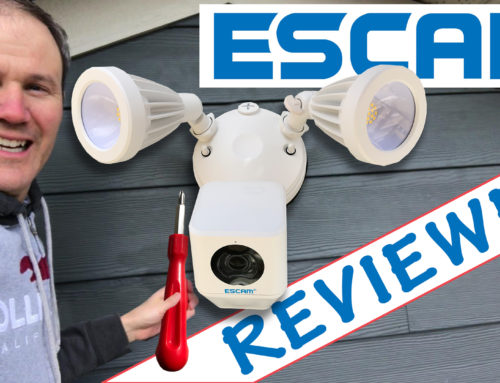
Hey Guys,
This is a detailed video/blog post of the app “Floodlight Cam” used by ESCAM’s WiFi floodlight and camera combo. I recently installed this over my garage door and presented everything you need to know about setting it up. Let’s take it a step further and check out all of the features of the app and the floodlight camera.
In the last video, we already downloaded, installed and connected the app to the WiFi device. If you haven’t done so, do check out that video first. Again, not an ad for ESCAM. I’ll tell you what I like and dislike about the app and the floodlight cam.


Floodlight Camera by ESCAM, No Monthly Fees - Wireless Outdoor Security Cameras for Home Security System with Motion Sensor Light - HD, Motion Detection, Siren Alarm, Two Way Talk, White
Discount Code: GKH26TPU
- When you open the app, you’re presented with your device list. I like the layout here, especially how it tells you the device connection status in the bottom left even before you attempt a live view connection. In the bottom right you can control the light without even looking at the camera’s live stream. Turn it on, off and back to auto. To the right, there are 4 squares. This is a menu for 4 options.
- A reconnect button in case you are having connection issues
- A film button to take you to the phots or videos you have saved on your phone from within the app. You can also switch over to the micro SD card to see saved motion detection footage or full-time recordings.
- This is your device’s QR code and ID number used to identify your camera to the app. Grab a screenshot just in case you lose the tag with the QR code.
- The last button is used to delete the device from your phone. It looks like associated photos will be deleted. I don’t believe the micro SD card is deleted but before doing this, backup and data. You can also reset the device to factory settings from here.
- Click the play button to enter the camera’s live view page. Immediately below the video feed we have 4 icons.
- The speaker icon allows you to listen through your mobile device.
- A low definition and high definition quality stream toggle. Unfortunately, this setting doesn’t save. If you want to see the feed in HD, you’ll need to press this button every time you open the live feed.
- The bell is a set of prerecorded messages you can play through the camera’s speaker. The echo is because sound is playing through both the phone and the speaker.
- The 2 arrows are for full screen viewing. I wish turning the mobile device sideways would initiate this. The camera has a viewing angle of 140 degrees. Here is a recap from my other video. I’ll approach the camera from 25 feet away. At the 15-foot mark, you can read easily the license plate and identify faces. Good image, great sound capturing. Here at night, the IR lights aren’t very bright but that’s ok because once someone or something triggers the PIR motion sensor, the bright LED lights will take over and in fact. So bright that they allow the camera to record in the daytime color mode.
- Now, let’s look at the easy access buttons:
- The SOS button will take you to the dialing interface and call 911 or a predefined number.
- The middle button turns the light on and off or on auto mode. Auto means it will turn on when motion is sensed at night.
- The siren button, when clicked gives you a warning about it being loud. Here’s a quick test from 10, 50 and 300 feet. Adjust your volume, it’s about to get loud.
- On the next page we can take snap shots and videos which are saved on your mobile device and accessed through the Storage link on the bottom of the screen. Move the snapshot or video to your camera photo roll by clicking save. Under storage, we see the photos and video I just took and the option to save them to my phone’s photo roll.
- Click the mic button to talk through the camera’s speaker. When I am outside of my home network, there is still little to no lag. Oh yeah, an important note. Don’t start speaking until you see the counter start.
- Let’s jump into the settings by clicking the gear icon in the upper right.
- The Network Information shows your WiFi name and the strength of the connection between the camera and the WiFi modem, router or access point.
- Device Info gives you the option to update the device name and shows the model, ID and firmware version.
- Modify Device Password is pretty straight forward. Enter the old password and the new one. Press modify to save.
- Video flip allows you to flip the image vertically, horizontally or even mirror it depending on how you setup the camera. You can also show or hide the on-screen display of the date and device name here.
- Record Setting lets you configure when you want to record footage; never, all the time or just when motion from the camera is recorded. You can also format the card here, let’s do that now.
- Motion Detection Setting – Again, this is for the camera. You can set the sensitivity of the motion to low, medium, high or maximum. Configure the zone by clicking the wrench. Update the area and click save. The section for Motion Detection Ring Alert Setting is for when you have the app open and motion is detected and how you want to be notified because the push banner notices are off when the app is open. You’ll see a notice on the bottom of the screen with a bell tone or vibration. When the app is closed, this is what the notification banner for motion looks like. Remote Notification means, you’ll receiver alerts when motion is detected, but I receive alerts with this turned off. Note that when motion is sensed during the day, the lights don’t turn on. Also be aware that changes in lighting conditions, fog, snow, rain or a bee can set off the motion alert.
- Under Mail alarm, you can have a notification emailed to you if motion is detected. Certain providers are pre-programmed in.
- Audio Volume Setting controls the speaker volume and the mic sensitivity.
- Under Detection Zone Setting, this is where you would configure the Floodlight PIR proximity sensors. You can adjust the sensitivity of all 3 zones and toggle them on or off depending on where you have your fixture installed and how close you want motion to occur before the lights are triggered. For me, it varied. Motion was sensed 30 feet away but sometimes I could sneak up on it and the lights would come on at 10 feet away. They may even turn on in the evening as the air is cooling off causing temperature differences between the air, objects nearby and the ground.
- Alarm Setting is where you would set the length of time the lights stay on after motion is detected by the PIR light sensors. The speaker can also play a prerecorded message here and you can adjust the volume from 0 to 15. Both my phone and the fixture play the selection when updating the sound. The sound is only triggered by the PIR sensor at night and not the camera’s motion sensor by day. As I approach the camera, the PIR sensor goes off and the sound is played. The click you hear is the camera switching to daytime mode because the lights are so bright.
- Set up time alarm – This is where you control getting mobile notifications on your phone and recording events on the micro SD card. It can be on all the time, between 8pm and 8am, or on a set schedule. Linkage alarm sound turns on the siren when motion triggers the camera. In the day, if motion is detected, the siren is the only sound you can play automatically.
- Safety detection is a tamper alarm against vandalism.
- Set up time zone is pretty obvious but the app doesn’t account for daylight savings, and the option to sync the camera with your phone didn’t work for me. You may need to select the time zone to your east to make this accurate during Daylight Savings.
- Under Restore, you can reset individual sections or reset all, which the button on the bottom does.
- Then a device reboot
- Back on the live view page, click on the storage link at the bottom. Under SD card, we see the events which are recorded. This is great but to make it better, I’d love to see a small screen capture of the trigger event in each line item here.
- When I was testing these features today, I switched back and forth between my home WiFi and the cellular network. I noticed the app wouldn’t connect when I switched. It needed to be closed and re-opened before it would connect to the device on the new network.
- I also noticed, at least on the iPhone anyways, the screen doesn’t dim and lock after inactivity.


Floodlight Camera by ESCAM, Wireless Outdoor Security Cameras for Home Security System with Motion Sensor Light - HD, Motion Detection, Siren Alarm, Two Way Talk, Black
As I stated before, this WiFi Floodlight Cam is an awesome bang for your buck. Do check out the link below and the discount code if the product isn’t already on sale for $170US from 200. I love quick connection time when I open the app. The lack of video lag and instant control of the light are sure pluses for me. The 2-way audio is also fantastic. If you haven’t checked out my detailed review and setting up fixture, please do so.

![[Older Version] SanDisk 128GB Ultra MicroSDXC UHS-I Memory Card with Adapter - 100MB/s, C10, U1, Full HD, A1, Micro SD Card - SDSQUAR-128G-GN6MA #1](https://m.media-amazon.com/images/I/41FwW1I45rL._SL100_.jpg)
![[Older Version] SanDisk 128GB Ultra MicroSDXC UHS-I Memory Card with Adapter - 100MB/s, C10, U1, Full HD, A1, Micro SD Card - SDSQUAR-128G-GN6MA #2](https://m.media-amazon.com/images/I/41A8MQKLuEL._SL100_.jpg)
![[Older Version] SanDisk 128GB Ultra MicroSDXC UHS-I Memory Card with Adapter - 100MB/s, C10, U1, Full HD, A1, Micro SD Card - SDSQUAR-128G-GN6MA #3](https://m.media-amazon.com/images/I/411mXHWX8aL._SL100_.jpg)