Today we are configuring Reolink’s 8-channel, 4K Network Video Recorder for first time use. We’ll walk through the initial steps required to get the NVR up and running and review some issues you may run into. I’ll connect the cameras to the back of the NVR with the supplied cables and run through the NVR initiation process, to ensure the cameras are working as expected and that we can record footage to the internal hard drive. I like to verify this basic functionality before installing the cameras in their permanent location to ensure all parts are working. If the system was fully installed and there was a connection issue, it would be much harder to debug and troubleshoot when my wires are tucked away in walls or the attic.
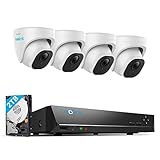


REOLINK 4K Security Camera System, 4pcs H.265 PoE Wired Turret 4K Cameras with Person Vehicle Detection, 4K/8MP 8CH NVR with 2TB HDD for 24-7 Recording, RLK8-800D4
This NVR can be purchased on its own or as a part of a kit with multiple cameras. This one came as an all-in-one solution with 4 x 4K cameras. I have already unboxed the system and introduced all of their technical specifications in a previous video. Do check that out for a solid understanding of what this system includes and offers. The NVR alone will run you about $200US. As a part of a 4-camera kit, the cost is closer to 500, which, like I mentioned before if a great price for such a quality system. I’ll add direct links to Reolink and Amazon in the description. Sometimes I have coupon codes for use on the Reolink site, which I will also add below.

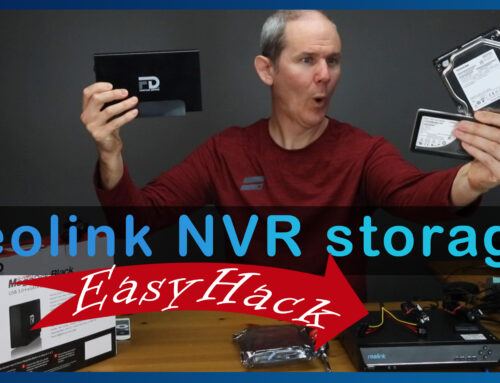
Western Digital 4TB WD Purple Surveillance Internal Hard Drive HDD - SATA 6 Gb/s, 64 MB Cache, 3.5" - WD40PURZ
So, we have completed the wizard, and we can see the cameras displayed on the screen. If the cameras were not added, as expected, we would right click the home icon to go to the main menu. We are brought to the section called “IP channel”. Here we have the status of each camera connected to the NVR and on the network.
Some status values you could see are Previewing, Offline or Invalid Password. Here I’ll reassign each camera to a different channel placeholder. Once I make my change and hit Apply, it took about 2 minutes for the changes to take effect. Back in my other scenario when I setup the NVR and was connected to my network, the connected cameras had a status of disconnect and here they have a blank status value means there is no channel assigned to the camera. To fix that, I need to give each one a channel, like so and then the NVR will pick them up and display their live feed. A little confusing but a pretty easy fix.
Lastly, let’s make sure all the cameras are recording continuously to the hard drive. Go down to “Recording” and the “Encode” tab here shows the video properties. I’ll check “Record Audio” because I want to record any sound. I’ll keep the other settings as-is because I want to record at 4K resolution with a maximum frame rate with a high-quality Bit Rate. Main Stream of course is the feed recorded by the NVR and the Sub Stream is a lower resolution stream for viewing the feed on the app if you need to save on data or are not in an area with a fast connection. I’ll check all 4 cameras to ensure they all have the same settings.
Over on the Schedule tab, we can configure how we want to handle recording for each camera (or channel) using this dropdown. The “Enable” checkbox allows us to turn on and off the recording schedule, which this is colored section below. Blue mean “Normal” which really means continuous recording. By default, all cameras are continuously recording. Green is to record footage just when motion is detected. White means to skip any recording during this time period. Here, for Camera 2, from Sundays to Thursdays, let’s set it up to record just when motion is detected between 6am and 6pm. And let’s turn off recording on Fridays and Saturdays let’s stop recording on this camera. Hit Apply to save and I’ll make sure it saved by going to camera 3 and then back to 2. Ok, look good to me.
Alright guys, that covers the basics of getting this Reolink 4k system up and running. For me, the wizard covers unnecessary configuration and is too technical for the device initial setup and lacks the assistance you would expect from a wizard. The user interface is a little rough and could use some polishing. On the other hand, I liked how the cameras auto connected and started fulltime recording. Reolink has also redeemed themselves with the mobile app and Reolink client with a good user experience. My advice would be to go through the wizard, like I did and configure the minimum amount to get the system functional. After that, connect with the mobile app, Reolink client or web browser for additional changes and even for playback. More videos to come on this and the advanced features this 4k system offers.